
To fix a leaking gutter joint, unclip the union piece, clean both gutter ends and the fitting, replace the rubber seal if it’s hardened or cracked, refit the union to the correct expansion mark, and run a thin bead of exterior-grade sealant inside the joint as a backup layer. Most repairs take 30–60 minutes and cost under £15 in materials if you do them yourself. If the joint is above single-storey height, or keeps failing after repeated fixes, Hibbs Roofing and Building Ltd provides trusted uPVC fascia and guttering services and covers repairs like this across Ashford and the wider Kent area, so it’s worth a call before you get the ladder out.
Why Gutter Joints Leak
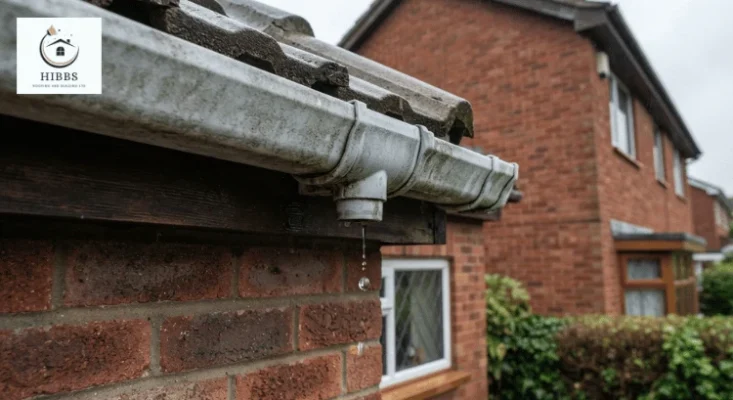
A gutter joint, also called a union, is the point where two gutter lengths meet and is held together by a clip-on fitting with an internal rubber seal. It’s the weakest point in any gutter run, and a handful of causes account for almost every dripping gutter joint.
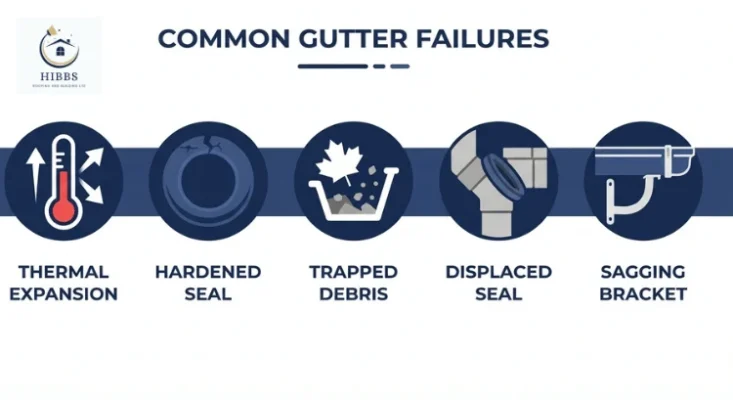
Thermal expansion and contraction
Gutters expand in heat and contract in cold; a 4-metre length can move 6–10mm between seasons. If the joint wasn’t left enough room to move, that shift eventually pushes the seal out of position.
A hardened or perished seal
Rubber seals lose their flexibility with age and UV exposure, especially on sun-facing sides of a house. Once a gutter joint seal stops compressing properly, water gets through.
Debris trapped in the joint
Grit, moss, and leaf fragments can wedge between the seal and the gutter, creating a small gap through which water can flow.
A displaced or missing seal
Sometimes a seal gets knocked out of its groove entirely during cleaning or a previous repair, or was never fitted correctly to begin with.
Sagging brackets
Sagging brackets are among the most overlooked causes of leaks at gutter joints. If a support bracket near the joint has come loose, the gutter sections can shift apart within the joint, breaking the seal. This is often one of several early signs your roof and guttering need attention.
What You’ll Need To Fix A Leaking Gutter Joint?
Item | Purpose |
Ladder or step ladder | Safe access to the joint |
Flat-head screwdriver | Releasing the union clip |
Cloth or sponge, warm soapy water | Cleaning the gutter ends and fitting |
Replacement rubber seal (if needed) | Restoring a watertight seal |
Exterior-grade silicone or gutter sealant | Secondary waterproofing layer |
Sealant gun | Applying sealant cleanly |
Garden hose | Testing the repair |
Step-by-Step Guide to Repair a Leaking Gutter Joint
Locate the Leaking Joint
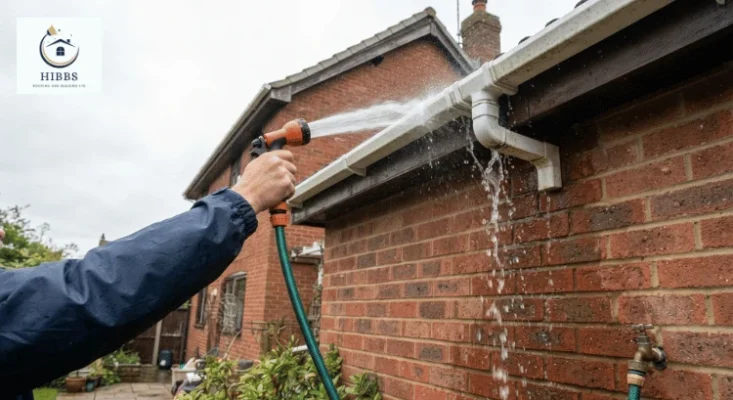
Before touching anything, run a hose through the gutter section by section and watch from underneath. The exact spot where water drips, or a wet patch appears, is your problem joint; no guesswork needed.
Clear the Work Area
Remove leaves, moss, and debris from both sides of the union. A clean, dry surface is essential; anything left behind will stop the new seal or sealant from bonding properly.
Release the Union Clip
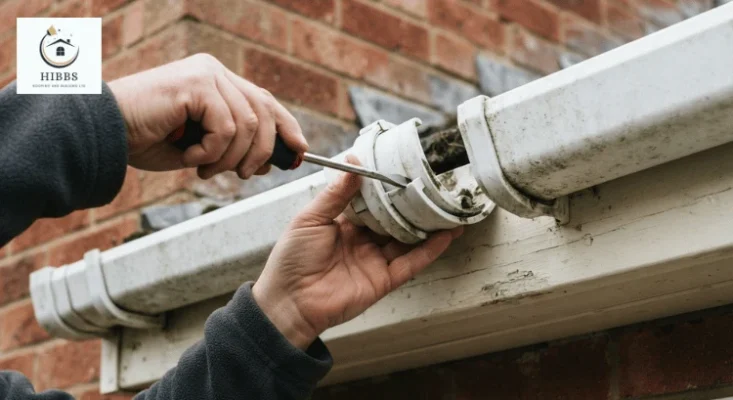
Use a flat-head screwdriver to gently pry open the union clip. Most clip-style fittings release with light pressure; avoid forcing it, as the plastic can crack.
Remove the Union
Once the clip is open, lift the union away from both gutter ends. This exposes the joint fully so you can inspect and clean it properly.
Clean All Surfaces
Wash the gutter ends, the inside of the union, and the seal itself with warm soapy water. Old grime, dirt, and leftover sealant residue are the main reason repairs fail; a new seal needs a completely clean surface to grip.
Inspect and Prep the Seal
Check the seal for cracks, warping, or perishing. If it still looks intact, it can be reused; if not, replace it. Either way, run a thin bead of sealant inside the union where the seal sits; this acts as a backup layer, not a replacement for the seal.
Refit the Union
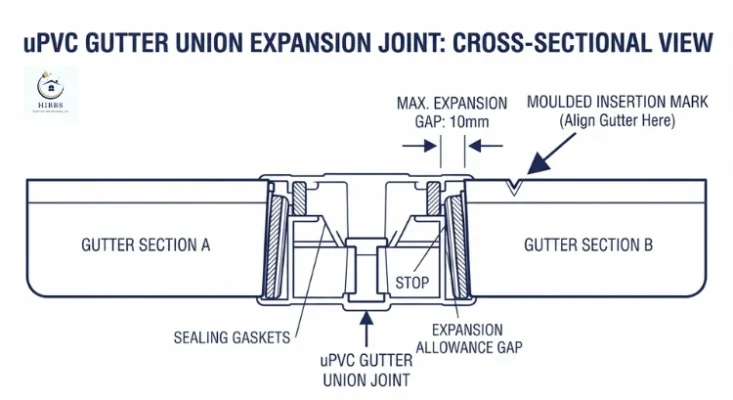
Slide each gutter end back into the union until it reaches its moulded insertion mark. Stopping at this mark matters; it leaves the correct expansion gap for temperature changes. Once positioned, snap the clip firmly back into place.
Test the Repair
Run the hose through the gutter one more time and check underneath. If there’s no drip, the joint is sealed, and the job is done.
Which Sealant to Use?
Not all sealants are equal for this job, and using the wrong one is one of the most common reasons a leak at a gutter joint doesn’t last, with the joint starting to drip again within weeks.
- Exterior-grade silicone sealant is the standard gutter joint sealant; it stays flexible enough to handle the joint’s constant expansion and contraction.
- Dedicated gutter or roofing sealant performs even better outdoors and is worth the small extra cost over generic silicone.
- Avoid bathroom or acrylic sealant. These aren’t designed for constant outdoor exposure, don’t bond well to wet or dirty PVC, and typically fail within a season.
Sealant is never a replacement for the rubber seal; it’s an added layer of protection, applied inside the union alongside the seal, not smeared over the outside of an undismantled joint. A joint sealed only on the outside, without first being taken apart and cleaned, is a short-term patch at best.
Repairing Leaking Gutter Joints by Material
The core principle is the same across materials, but the details differ enough to matter.
uPVC (the most common type in Ashford and across Kent)
uPVC joints rely on the rubber gasket doing most of the work. Follow the step-by-step process above: clean, inspect the seal, reseal, reassemble with the correct expansion gap. uPVC becomes brittle after 15–20+ years of UV exposure, so if the plastic itself looks chalky, faded, or is cracking at the clip lip, replacing the whole union, rather than just the seal, is usually the better fix.
Cast iron (common on older, Victorian-era properties)
Cast iron gutter joints are typically bolted together with a putty or mastic seal rather than a rubber gasket and clip. These systems are most common on period properties with traditional roofing, and if you’re planning wider roofline work, our guide to roofing materials explains what typically accompanies cast iron guttering on older homes. To fix a leak, unbolt the joint, clean both surfaces back to bare metal, and reseal with linseed oil putty or a modern gutter mastic before rebolting
Aluminium
Seamless aluminium gutters have few true joints, mainly at corners and outlets, since long runs are usually a single continuous piece. Where a joint does exist, it’s typically sealed with an industrial-grade sealant and riveted rather than clipped. These are harder to disassemble safely without specialist tools, so a leaking aluminium joint is one of the few cases where calling a professional is usually the more practical option.
How Much Does It Cost to Fix a Leaking Gutter Joint Yourself?
If you’re supplying your own labour, the materials for a typical uPVC joint repair are inexpensive:
Item | Typical Cost |
Replacement rubber seal | £2–5 |
Replacement union clip (if needed) | £3–8 |
Tube of exterior-grade sealant | £4–8 |
Total (DIY, per joint) | £9–21 |
Most homeowners already own a ladder, screwdriver, and sealant gun, which keeps the real cost down to just the seal or union and a tube of sealant. A single joint typically takes 30–60 minutes.
Should You DIY or Call a Professional?

If height, access, or a recurring leak makes this a job for the professionals, working with experienced roofing contractors takes the guesswork out of it.
DIY | Professional | |
Cost | £9–21 in materials | Labour and access included, quoted per job |
Time | 30–60 minutes | Usually same-day or next-day booking |
Best for | Single-storey access, uPVC joints, a confident DIYer | Height or access issues, cast iron, repeated failures at the same joint |
For comparison, see typical roof repair cost UK figures if you’re budgeting for wider roofline work. Calling a professional is the sensible choice if the joint is above single-storey height, if it’s a cast iron or aluminium joint you’re not equipped to disassemble safely, or if the same joint keeps failing after repeated DIY attempts, which is usually a sign of a bracket or alignment problem beyond the seal itself.
How To Prevent Future Leaks
- Leave the correct expansion gap every time you refit a joint; use the moulded insertion marks inside the union rather than pushing the gutter ends flush together.
- Inspect joints twice a year, ideally during your spring and autumn gutter cleans, looking for staining beneath a joint or any visible gaps.
- Add a bracket within 150mm of each joint; unsupported joints sag and move, which puts extra strain on the seal.
- Clean gutters regularly so trapped debris doesn’t work its way into the seal, one of the simplest habits for avoiding leaking gutter joints in the first place.
Regular inspections are also typically included in professional roofing services as part of a maintenance visit, so it’s worth asking whether this is covered when booking one.
Conclusion
A leaking gutter joint is usually a simple fix: clean the joint properly, check the seal, and respect the expansion mark when refitting. Most repairs take under an hour and cost less than £20. But if the joint is cast iron, hard to reach, or keeps leaking despite repeated fixes, that’s often a sign of a bigger issue worth getting checked.
Hibbs Roofing and Building Ltd covers these repairs across Ashford and Kent, so contact us today for a free quote if your gutter’s still giving you trouble.
FAQs
Are gutter joint repair kits actually reliable?
For a straightforward, accessible uPVC union, yes. A kit gives you the same seal and sealant as a manual repair, just pre-packaged, so it’s a solid shortcut if you’d rather not source parts separately. Just double-check the kit matches your gutter’s profile before buying, since union sizes vary by brand.
Can a leaking gutter joint cause damage to my house?
Yes. A constant drip at one spot can saturate the fascia board behind it, rot the timber over time, and often leave damp patches or staining on the wall below, especially on a shaded, slow-drying side of the house.
Is it normal for a gutter joint to leak again after repairing?
If it fails again quickly, the most common cause is an incorrect expansion gap: the gutter ends were pushed too close together, so the next hot day forces them apart and breaks the new seal. It can also mean the joint needs to be replaced entirely rather than just resealed.
Do I need to replace the whole gutter section, or just the joint?
Just the joint or union in most cases. You only need to replace a full gutter length if the plastic itself is cracked, warped, or brittle beyond the joint area.
Will my home insurance cover gutter joint repairs?
Standard buildings insurance typically doesn’t cover general wear-and-tear repairs, such as a leaking gutter joint; it’s considered routine maintenance. It may cover resulting damage, such as a rotted fascia or a damp wall, in some cases, so it’s worth checking your specific policy if damage has already occurred.
