
Quick Answer: You can clean moss off your roof safely by brushing away the loose growth, treating it with a roof-safe moss killer, rinsing gently, and clearing your gutters afterward never with a pressure washer.
If you’ve spotted green patches spreading across your tiles, moss might look harmless, but Ashford, Kent weather gives it everything it needs to spread fast, and left untreated, it can lift tiles, trap moisture, and lead to leaks inside your home. Whether you’re searching for how to remove moss off a roof for the first time, looking to get rid of moss on a roof that keeps returning, or simply want a safer way of removing moss from a roof than last time, this guide covers it.
In this guide, we’ll walk you through exactly how to clean moss off your roof safely, the mistakes that cause the most damage, and how to stop moss coming back for good.
Why Moss Grows So Easily on Ashford Roofs
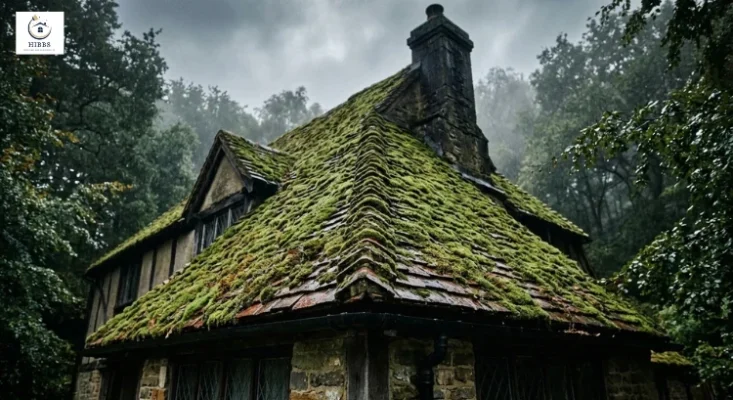
Moss is a small, spore-based plant that thrives in damp, shaded conditions, which makes Kent’s climate close to ideal for it. Roofs that face north, sit under overhanging trees, or have blocked gutters hold on to moisture far longer than roofs that get full sun and good drainage, and that trapped damp is exactly what moss needs to take hold.
Once moss establishes itself, it doesn’t just sit on the surface. It holds water against the tiles, which can cause cracking, lifting, and rot in the roof deck underneath. In colder months, that trapped water can freeze and expand, worsening any existing damage. This is exactly why so many Ashford homeowners search for how to eliminate moss on a roof before it reaches this stage. Catching it early, before it spreads across the whole roof, makes cleaning moss off a roof quicker and far cheaper than waiting for a full roof clean.
Step-by-Step Guide to Clean Moss Off Your Roof Safely
Cleaning moss off a roof isn’t complicated, but doing it in the wrong order or with the wrong tools is how homeowners end up with cracked tiles or a leak they didn’t have before. Whether you’re removing moss from a roof for the first time or repeating the job because it came back last year, working through the steps below in the right order protects both you and your roof. Take your time with each stage rather than rushing to get moss off a roof in one go. A dry, calm day makes every step easier and safer.
Step 1: Put Safety First
Before you touch a single tile, make sure you’re properly set up. Use a secure, stable ladder placed on level ground, and wear non-slip shoes, gloves, and eye protection. Never walk directly on the tiles themselves; even tiles that look solid can crack under weight you wouldn’t expect, especially older or weathered ones. If your roof is steep, high, or hard to access safely, this is the point to call in a professional rather than risk a fall.
Step 2: Brush Away the Loose Moss
This is usually the stage homeowners picture when they think about removing moss from a roof. Use a stiff, soft-bristled brush or a long-handled broom over the affected areas, always moving from the top of the roof downwards rather than side to side, so loosened debris and water don’t work their way under tiles further down. For thicker clumps, a small trowel or plastic scraper can help lift the moss without gouging the surface, but metal tools should be avoided as they can score or chip glazed tiles. Never use a pressure washer at this stage; the high-pressure water can strip the protective surface off the tiles and force moisture underneath, which is one of the most common causes of roof leaks after a DIY clean.
Step 3: Apply a Roof-Safe Moss Killer
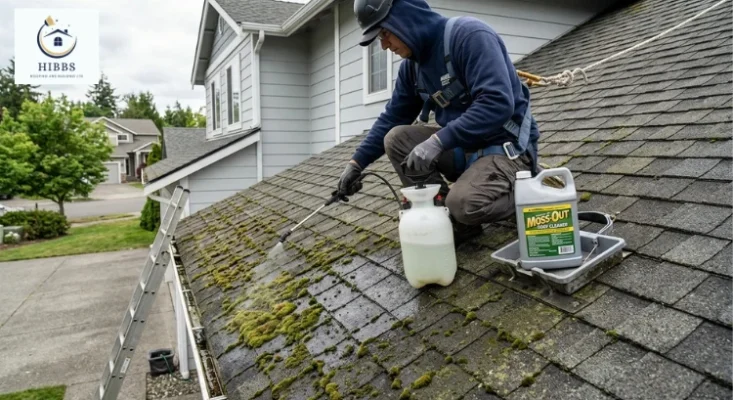
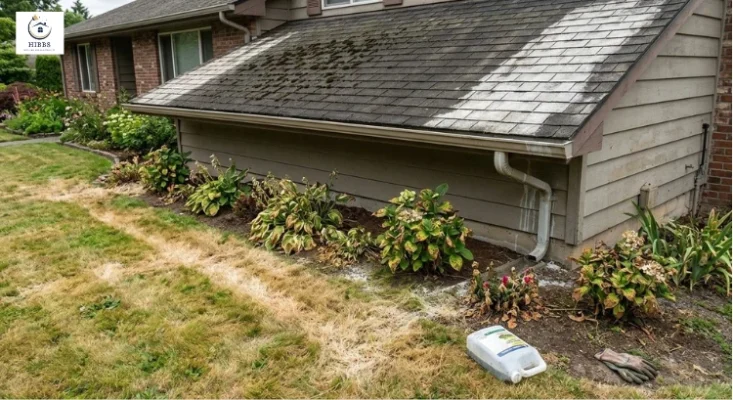
Once the bulk of the moss is off, apply a moss killer that’s specifically designed for roof tiles rather than a general garden or patio product. This treatment targets the tiny spores you can’t see with the naked eye and helps prevent the moss from regrowing within weeks of your clean. Cover any nearby plants, patios, or garden furniture with sheeting before you start, since most roof-safe treatments are still strong enough to scorch leaves or discolor paving. Use a garden pump sprayer for even coverage, working in the same top-to-bottom sections as before, and always follow the manufacturer’s mixing ratio and application instructions rather than guessing at strength.
Step 4: Let the Treatment Do Its Job
Resist the temptation to rinse or scrub straight away; give the moss killer time to work properly first. Some products start acting within a few hours, while others need several days to fully soak in, so check the packaging rather than assuming. During this waiting period, the solution works its way down into the moss and kills it at the root, rather than just the visible surface growth, which is what stops it bouncing back almost immediately. Try to pick a dry, mild spell for this stage, since heavy rain shortly after application can wash the treatment away before it’s had a chance to work.
Step 5: Rinse With Low Pressure Only
If the product instructions call for rinsing, use a standard garden hose on a normal setting rather than a more powerful one. Work from the top of the roof down so the water flows naturally into the gutters, taking the dead moss with it, rather than pooling or seeping under the tiles. This step washes away the loosened, dead growth and any remaining residue without putting any strain on the tile surface or joints.
Step 6: Clear the Gutters Once You’re Done
Loosened moss almost always ends up washed into the gutters, and a blocked gutter quietly undoes a lot of the good work you’ve just done. Clear them thoroughly once the roof is clean, checking downpipes as well as the gutter run itself, since a blockage further down can still cause water to back up and overflow. Standing water in a blocked gutter is exactly the kind of damp, shaded condition that lets moss return, so this step is as much about prevention as it is about tidying up.
Mistakes to Avoid When Removing Moss From a Roof
Most of the damage we see from DIY moss removal in Ashford comes down to a handful of avoidable mistakes, whether the goal is to clean moss from a roof for the first time or remove moss from a roof that’s been treated before.
Using a Pressure Washer
High-pressure water is the single biggest cause of tile damage during moss removal. It can crack the tile surface and drive water underneath, leading to leaks that show up weeks later.
Scrubbing Too Hard
Moss comes away easily once it’s been treated. Forcing it off with heavy scrubbing wears down the tile surface and shortens its lifespan for no real benefit.
Leaving Moss to Spread
Moss doesn’t go away on its own; it spreads, and the longer it’s left, the more roof it covers and the more expensive the eventual clean-up becomes.
Using Harsh, Unlisted Chemicals
Strong household chemicals can strip protective coatings from tiles and damage nearby plants. Stick to a product made specifically for roof moss.
How To Stop Moss Coming Back On Your Roof
Getting the moss off is only half the job; these habits keep it from returning.
Pick the Right Weather to Clean
A cool, overcast day is best for applying moss killer, since it prevents the treatment from drying out before it can work properly into the moss.
Work in Small Sections
Tackling the roof in manageable sections, rather than trying to do it all at once, means you’re less likely to miss patches or rush the job.
Deal With It Early
The sooner moss is treated after you spot it, the smaller and cheaper the job stays.
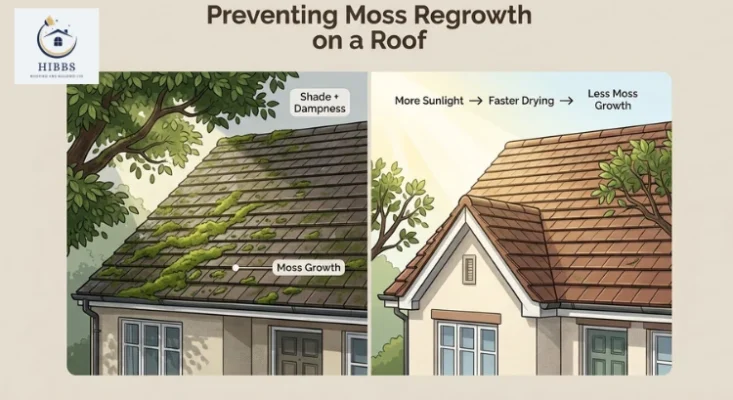
Trim Back Overhanging Branches
If you’d rather remove moss from a roof naturally rather than rely solely on chemical treatments, cutting back trees that shade the roof is the most effective step. More sunlight reaching the tiles dries them out faster after rain, which slows moss growth without any product at all.
Keep Gutters and Drainage Clear
Standing water is moss’s favourite growing condition, so keeping gutters and downpipes flowing freely removes one of its main triggers.
Check the Roof Once or Twice a Year
A quick visual check twice a year catches moss while it’s still light growth, rather than a full covering that needs a much bigger clean.
When To Call A Professional Roofer In Ashford
A light covering of moss on a low, easily accessible roof is usually manageable yourself with the steps above. But if the roof is steep, high, heavily covered, or you’re not confident on a ladder, it’s not worth the risk.
At Hibbs Roofing and Building Ltd, our certified roofing specialists have been carrying out roof maintenance, repairs, and gutter clearance across Ashford and the surrounding Kent area for over 25 years, and we know exactly how local weather and roof types affect moss growth. Every job comes with a transparent, fixed-price quote, so there are no hidden costs once work begins. We also use the visit as a chance to check for any tiles, flashing, or gutters that need attention while we’re up there problems that are far cheaper to fix early than after a leak develops.
Conclusion
Moss might start as a small patch of green, but left alone, it holds moisture against your tiles, causing cracking and lifting and leading to leaks and rot underneath. Learning how to clean moss off your roof safely, brushing it away, treating it properly, rinsing gently, and clearing the gutters protects your home and avoids the costly repairs that come from rushing the job or using the wrong tools. Whichever term you searched to find this guide, from how to get moss off a roof to removing moss from a roof for good, the same safe process applies. If your Ashford roof is high, steep, or heavily covered in moss, the certified team at Hibbs Roofing and Building Ltd is on hand for a safe, professional clean and a full check of your roof’s condition. Get in touch for a free, no-obligation quote and let our 25 years of local roofing experience take the risk out of the job.
FAQs
Can moss on a roof cause damp inside a house?
Yes. Moss traps moisture against the tiles, and over time that dampness can work its way through to the roof deck and ceilings below, especially where tiles have already started to lift.
Is it worth treating moss before selling a house?
Yes. A moss-covered roof is one of the first things a buyer or surveyor notices, and clearing it beforehand can prevent it becoming a bargaining point during a survey.
Does moss grow faster on older roofs?
Yes. Older tiles tend to have a rougher, more porous surface that gives moss spores an easier surface to cling to compared with newer, smoother tiles.
Can you remove moss from a roof in winter?
No. Cold, wet, or icy conditions make roof access more dangerous and can stop moss treatments from working properly, so it’s best to wait for a milder, drier spell.
